Whether editing an article from the Front or Back End, you will be using the same editor interface. Below is an overview of the available tools, as well as important best practices when it comes to formatting and pasting content.
Contents:
Layout
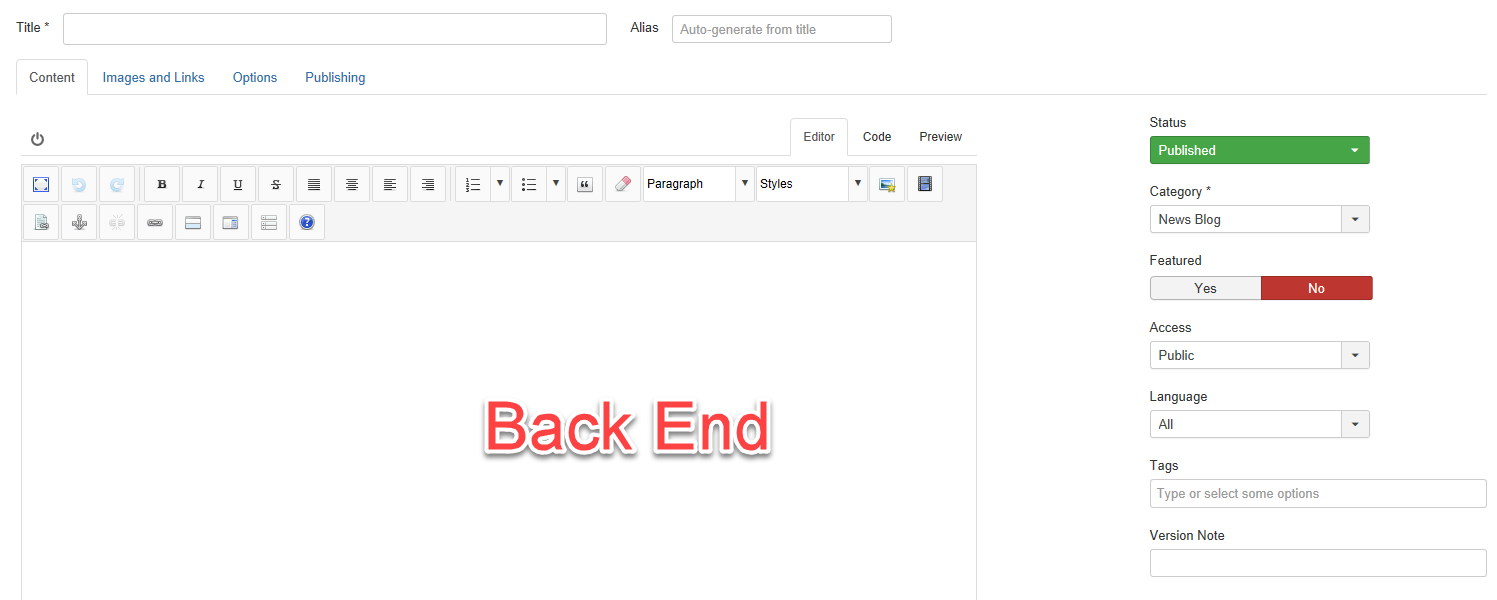
The layout is slightly different when editing an article in the Front End compared to the Back End, but the options are the same. The three tabs to focus on are "Content" "Images and Links" and "Publishing." The Back End shows some options (Status, Category, Featured, etc) in the right sidebar of the "Content" tab. Those same options are found under "Publishing" on the Front End. In this guide, we'll be focusing only on the editor, found in the "Content" tab.

The buttons availble in the editor itself are identical no matter where you find them. Below is a guide to the most frequently used features:
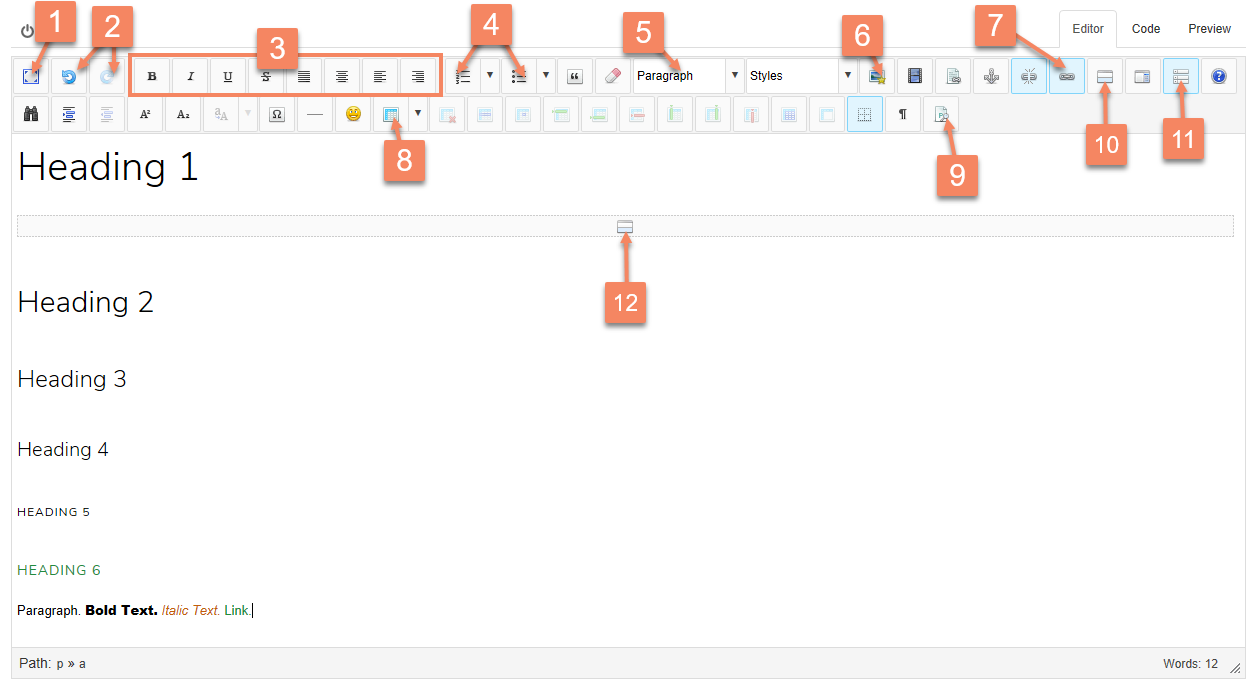
- Toggle Full Screen Mode. This can be helpful if you want to maximize your screen space and make the editor as big as possible.
- Undo and Redo. These let you step backwards or forwards through recent changes.
- Formatting and Alignment Options. Similar to any other editor, highlight any text and click to apply bold, italic, underline or strikethrough formatting. It is not recommended to change the text alignment in most cases, rather allow the default template settings to handle text alignment. The option is there, however, in case it is necessary.
- Numbered and Bulleted Lists. Click to insert a list, or turn highlighted text into a list.
- Select Block Element Type. This dropdown menu allows you to choose from standard HTML elements. The default element type is paragraph, but you can select headings to utilize styles that are defined by the template. NOTE: For best SEO practice, do not use Heading 1 within the article. Heading 3 is typically the best choice for section headings.
- Insert/Edit Images. This will insert an image into the body of the article, wherever the cursor is located. You can also use this button to edit the settings for any selected image already in the article.
- Insert/Edit links. This will allow you to turn any highlighted text or image into a link. You can also use this button to edit the settings for any selected link already in the article.
- Insert Table. This will insert an HTML table with as many rows/columns you choose.
- Toggle Block Element Indicators. This can be a helpful tool to discern what HTML elements you are using. It will outline and label each HTML element, including nested elements.
- Insert Read More Break. This is a crucial button for blog and provider articles. The Read More Break determines what is displayed in the blog layout vs. the full article page. For blog articles, it is recommended you insert this break after the first few sentences or introductory paragraph.
- Toggle Second Row. This toggles the second row of toolbar buttons (both rows are shown here). The second row contains infrequently used tools, and is hidden by default to save space.
- Read More Break Indicator. This is invisble when you are not in the editor. It simply shows where the Read More Break is placed.
Paragraphs, Headings, and Line Breaks
What's the difference? It is important to understand the differences between these HTML elements in the editor. The code is different for each, even though they can look like the same thing in the editor. A paragraph is an HTML element that has a beginning and an end. It is a "block" that surrounds all the text within it. By default, paragraphs typically have some extra vertical spacing between each other. Headings are also a "block" type of element, that can be used
instead of a paragraph to contain text. Headings apply font size and formatting options to all the text within them. Headings cannot be used
within paragraphs, or vice versa. Line breaks, on the other hand, are used within paragaphs and headings to force text onto the next line.
How are they used? You can switch between types of block elements using the dropdown list (#5 above). Pressing
ENTER will insert a new paragraph on the next line where your cursor is. pressing
SHIFT+ENTER will insert a line break instead of a new paragraph.
Why does it matter? Two line breaks may look the same as the space between two paragraphs, however this is bad practice for differentiating between paragraphs. For best consistency, make sure each paragraph is in its own paragraph block element. Furthermore, selecting a different type of block element (see #5 above) applies to the entire block. Unlike formatting options (such as bold and italics) the element type change is not restricted to the highlighted text. If all the text is in one big paragraph element, changing one line to a Heading 3 element means you will actually change the whole paragraph. For these reasons, it can be helpful to toggle the visual aid (see #9 above) to see which block elements are in use throughout the article:

Pasting Content
If you need to paste text from an external source (such as a Word file or another website) it is important to avoid bringing the source formatting along with it.Why? If you simply paste text as you normally would, the editor will attempt to copy the source formatting including font, size, color, and more. You should avoid this for two reasons: first, it causes inconsistencies throughout the site. Whenever possible you want to allow the built-in formatting of the website template to handle the fonts, sizes, and colors. You can use the block element types to select from standard styles (see #5 above). Secondly, it adds a lot of extraneous HTML and inline CSS code to achieve the source formatting. This makes it more difficult to edit, and in some cases can affect the performance and layout of the site.
How? There are a several ways you can avoid these issues.
- You can avoid pasting in the first place by typing content directly into the editor and using the built-in tools to format the article properly.
- In Chrome, use the shortcut "Ctrl + Shift + V" to paste text. This will automatically strip all formatting and paste everything as plain text with paragraphs and line breaks.
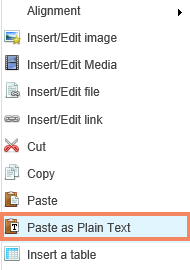
- Right-click in the editor and select "Paste as Plain Text" (or use the corresponding icon on the second row of the toolbar). This will bring up a dialogue where you can use "Ctrl + V" to paste the text, and all formatting will be removed, including paragraphs and line breaks.